Inner Voice – Learning Diary
FINAL PROJECT

LEARNING DIARY
Monday 7.9.2020
- 9.15-10 Course program and assignments
- 10-11 Teacher introductions ; Emmi Pouta, Antti Salovaara, Ilona Hyötyläinen, Valtteri Wikström
- 11-11.30 Students introductions
- 11.30-12 Examples from previous courses
Today I got some brief introductions about the difference between functional wear and wearable technology from the previous student works and research shown by Ilona and Emmi respectively. Wearable technology focuses on integrating electronics and interaction with soft materials such as fabrics, yarns, lamination, pigments and snap buttons.
Tuesday 8.9.2020
- Lectures: 9.15 Antti Salovaara, 10.00 Elina Ilen, 10.45 NN Tuesday 8.9 at 13.15-17 at campus
- Demos by Emmi & Valtteri at Megatronic lab and Sewing studio: Team A at 13.15-15, Team B at 15.15-17
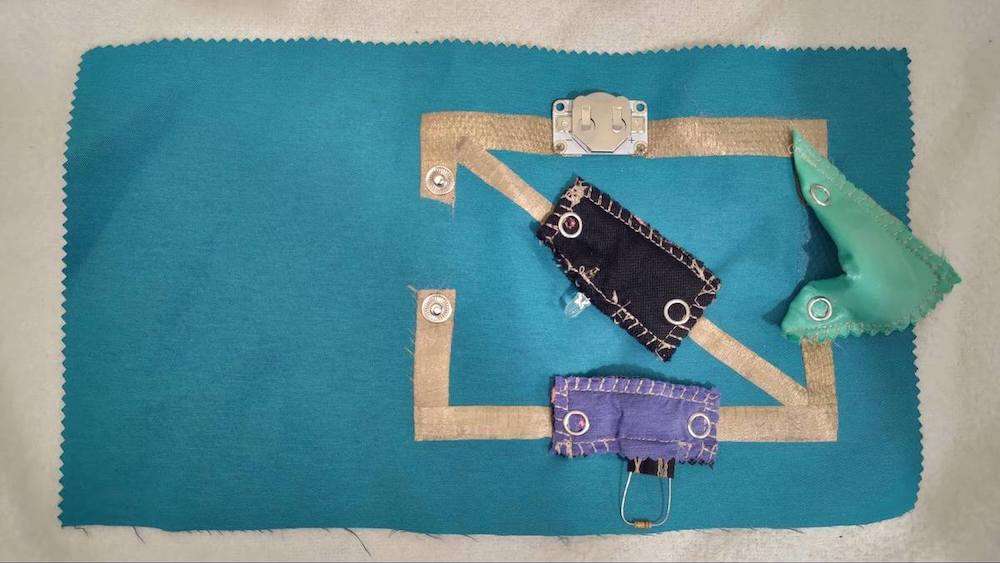
Today I learnt how to apply conductive fabrics and yarns given by Emmi to form a soft circuit and built a simple e-textile with fabrics and some electronics (e.g. LED, resistors and a coin battery). The image below is my first soft circuit made of fabrics and yarns.
Thursday 10.9
- Students presentations- see details at assignments
- 13.15-14.30 Functional materials lecture by Ilona
- 15-16 Wearable teams are formed
- 15-17 Functional wear first tutoring, choosing topic
- Jaetaan kaikille tarvittavat aineistot
During the course given by Ilona, I knew the definition of the functional wear and the difference between it and wearable technology. Functional wear mostly focuses on creative pattern design depending on the categories (e.g. outdoor, indoor, team, winter, water, running sports or workwear).
I learnt how to get inspiration related to e-textile from a useful website recommended by Emmi for finding a topic that interests me the most.
Monday 14.9.2020
- Programming by Antti
During the course given by Antti, I had a chance to review the basic usage of some of the electronics (e.g. Arduino boards, breadboards, jumper wires, resistors and LEDs) and how to upload our codes to Arduino to let it follow our logic to blink a LED.
Tuesday 15.9.2020
- Programming by Antti
- Prototyping simple circuit to fabric at Mechatronics lab and Sewing studio by Emmi
- Laminations at Sewing studio, by Ilona
- Working in separate rooms/studios in smaller groups
Today I reviewed about how to add interaction to Arduino by connecting a button to the LED and optimize the code with if/else block so that there will be more conditions (e.g. only blinking the LED with a button pressed) for us to interact with the LED.
Thursday 17.9.2020
- Programming by Antti
- Prototyping simple switch / sensor from hand movement at Mechatronics lab and Sewing studio by Emmi & Valtteri
- Working in separate rooms/studios in smaller groups
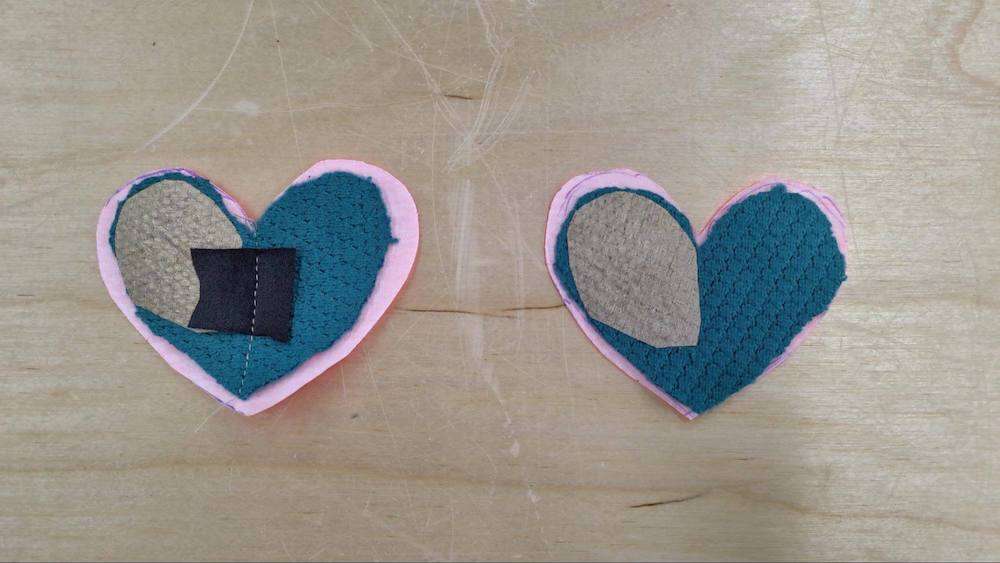
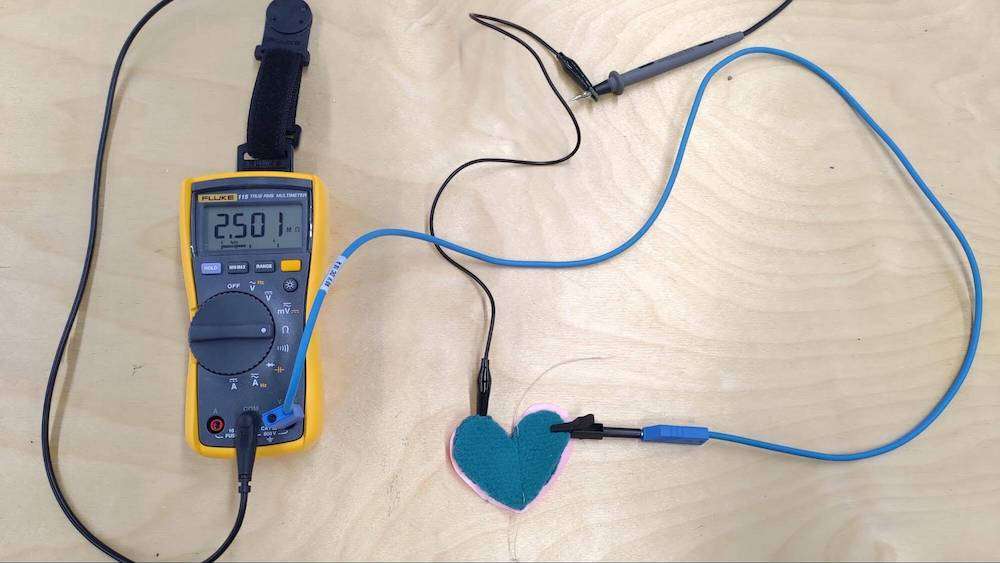
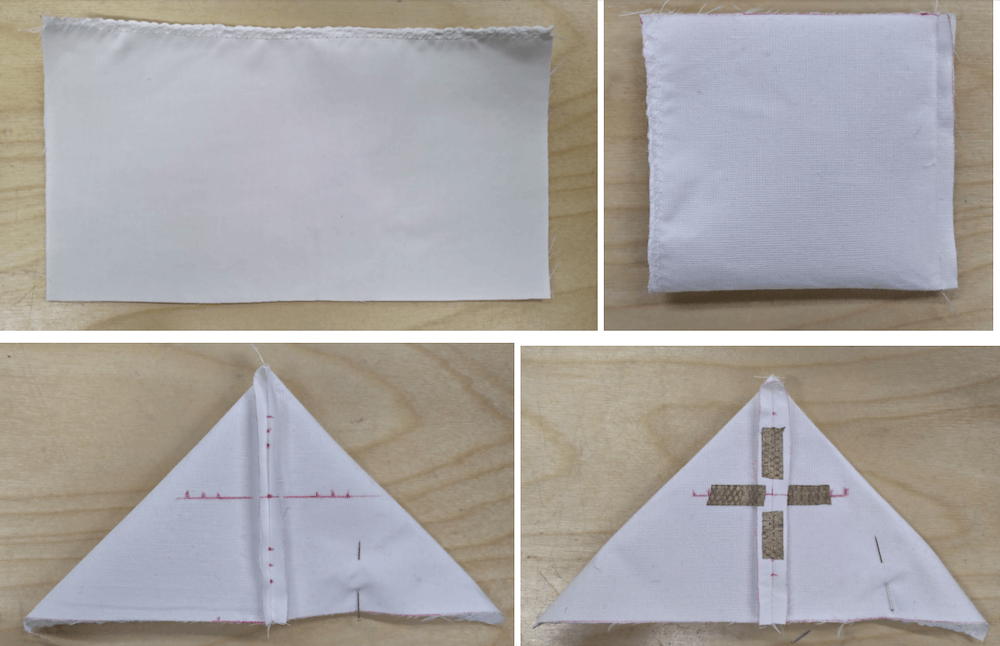
Today I learnt from Emmi about how to design and make our pressing sensors with piezo-resistive fabrics. During the course, I made a pressing button in heart shape with non-conductive, conductive and piezo-resistive fabrics inside to form certain layers for the conductivity. From the pictures below, the multimeter shows that there is high resistance (around 2.5M ohms) between the two endpoints of the button. However, once I press the button, the resistance becomes smaller (around 3.3k ohms).

Monday 21.9.2020
- At 9.15-10.15 lecture at zoom: Hydrophobic Surfaces in water-repellent and breathable clothing, Nina Forsmann, Chem At 10.30-12 lecture at campus: Footwear technology, Hanna Raatikka, room Q202
Today I learnt the fabrication process of making shoes and the components for footwear. Before the course, I hadn’t expected that there were so many layers and materials used for forming a shoe. A shoe consists of different kinds of upper layers (e.g. PA, PES, PP, PET, cotton, blends etc.), lining, reinforcing, cushioning materials, lasting sole, midsole, loose insole, outsole and grip. Also there are lots of conditions including shock absorption, torsion resistance, arch stability, antipronation, stability and water proof structure need to be taken into consideration during the design process.
Tuesday 22.9.2020
Today I got basic knowledge about functional details of various kinds of sportswear (e.g. hoods, font lists, pockets, cuffs, zippers, collars, pants, lining etc.). Some of them are designed for certain functionality. For example, zippers at the armpit are added for ventilation and lining materials can insulate our body from getting cold.
Thursday 24.9.2020
- First concept presentations by student groups / students, discussion and feedback
- 13.15-17 tutoring sessions by Ilona
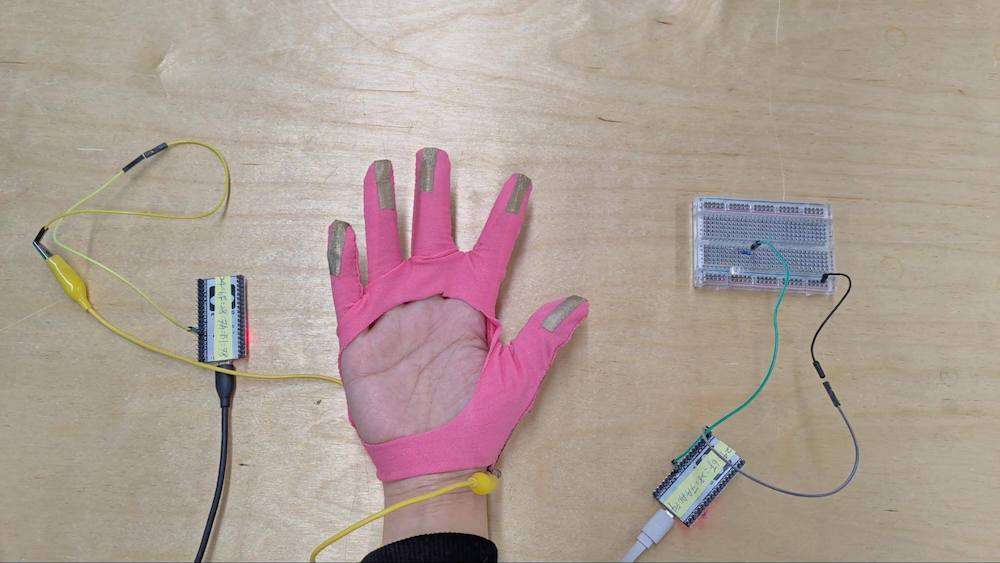
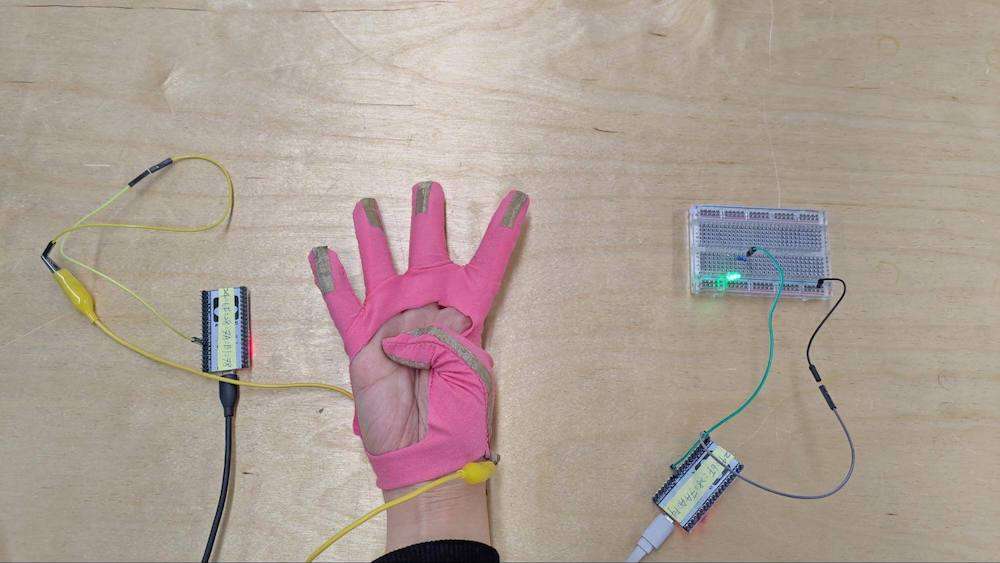
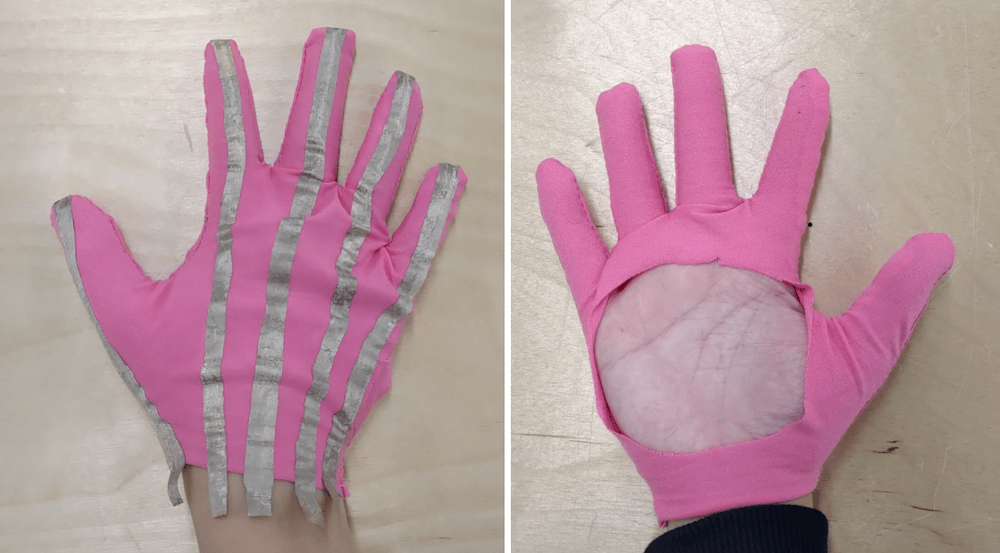
After the concept presentation, I started to make a glove with a simple pattern to test if one of my ESP32 microcontrollers can read any analog values from my gestures and then send the signal to the other ESP32 board to light up a LED. The images below show that the LED is lighted up when I press my thumb.
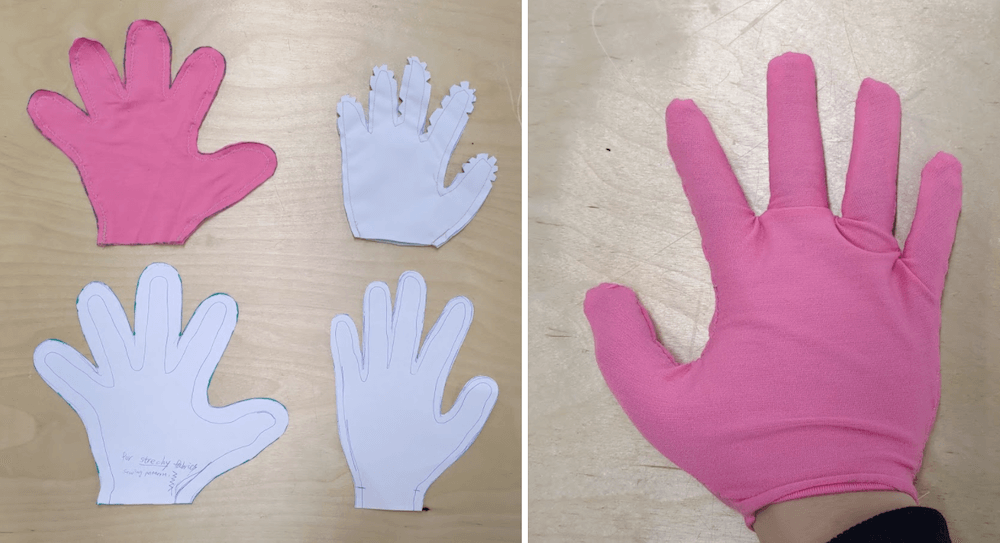
The simple pattern I made for the glove:
I ironed some conductive fabrics on the surface of the glove:
Monday 28.9.2020
- Wearable teams tutoring sessions at campus, By Antti, Emmi, Valtteri and Ilona, room Q202
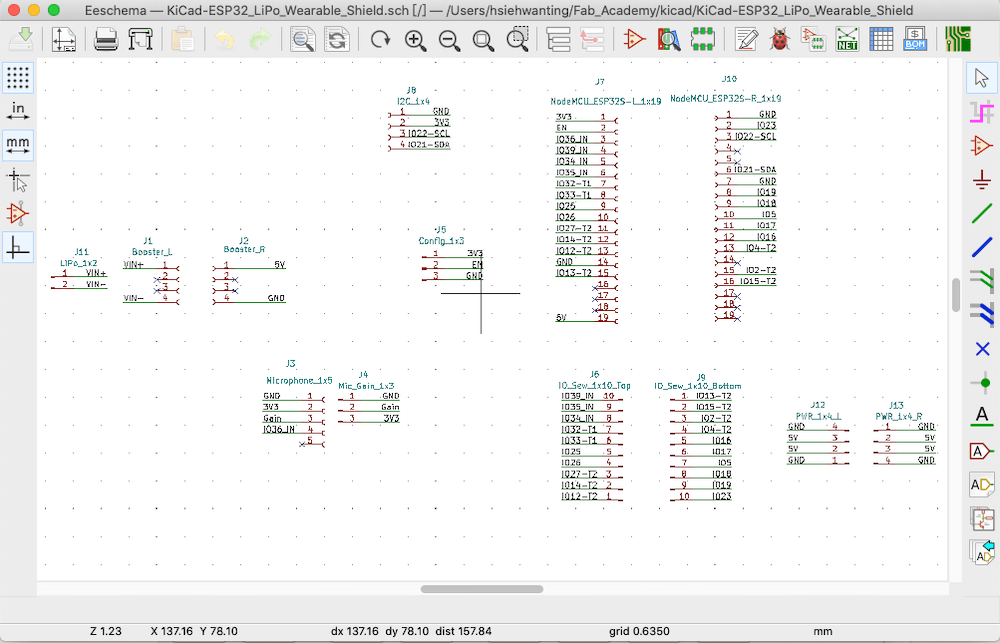
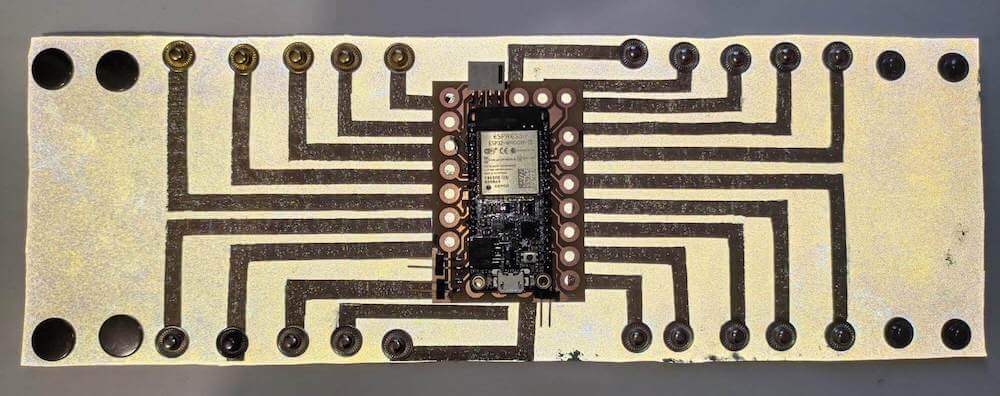
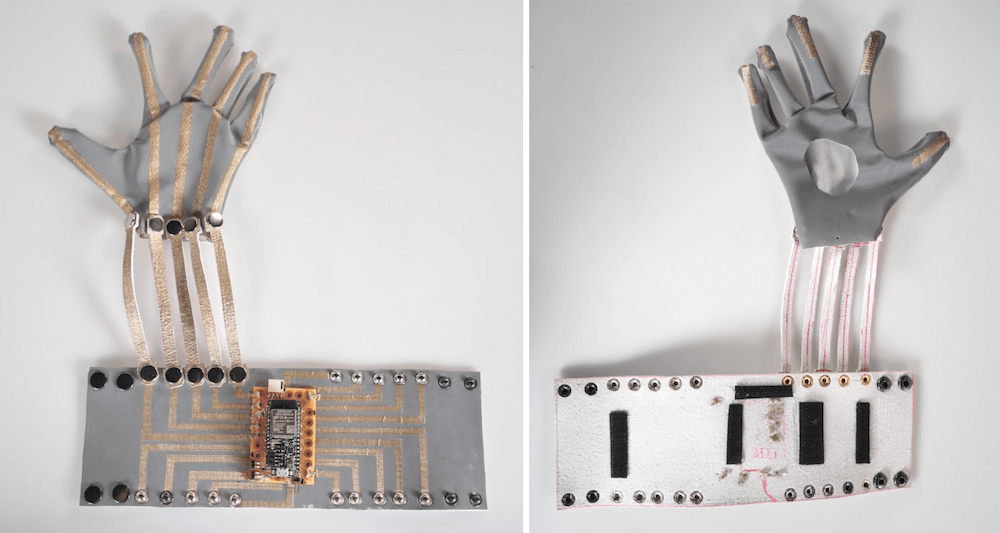
After confirming how many input and output pins I am going to use for my project and finishing some rough testing with Arduino, breadboards, jumper wires and a standard neopixel strip, I started to design each of the PCB shields in KiCad software by first connecting wires in the schematic view, defining the size of electronics and then placing each of the components at suitable position in the PCB view.
The main ESP32 shield for the belt controller (receiver) in the schematic view:
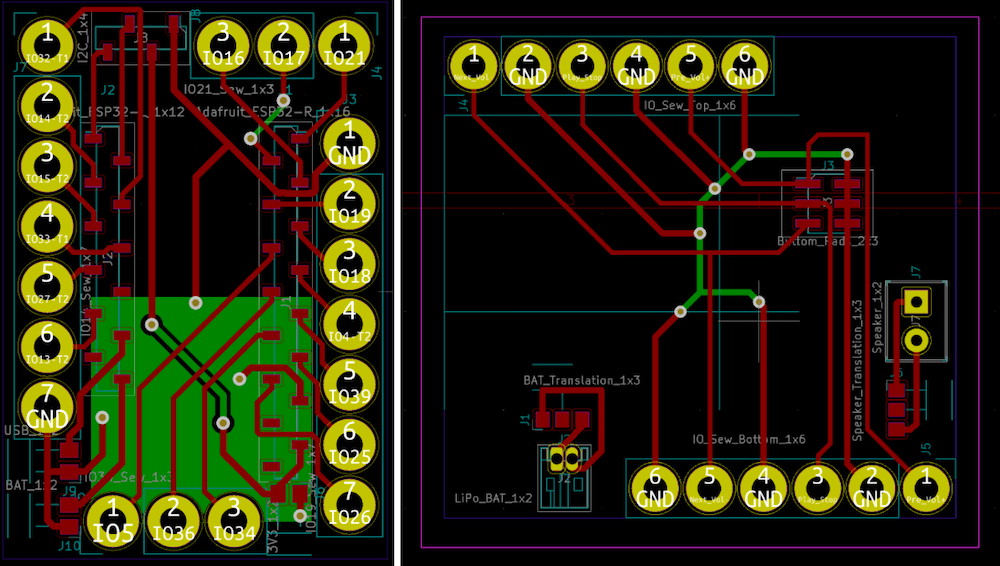
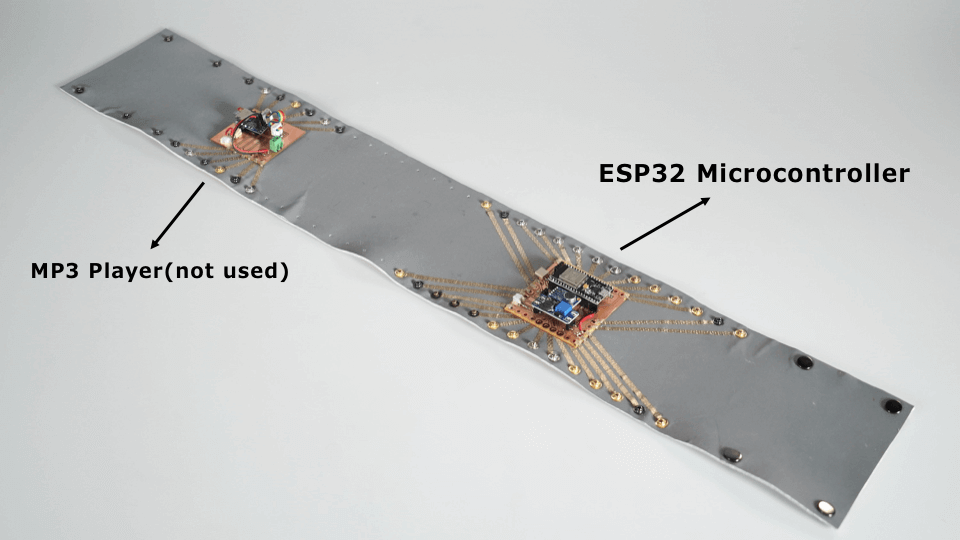
The main ESP32 shield (left) for the bracelet controller (sender) and the mp3 shield for the belt controller (right) in the PCB view:
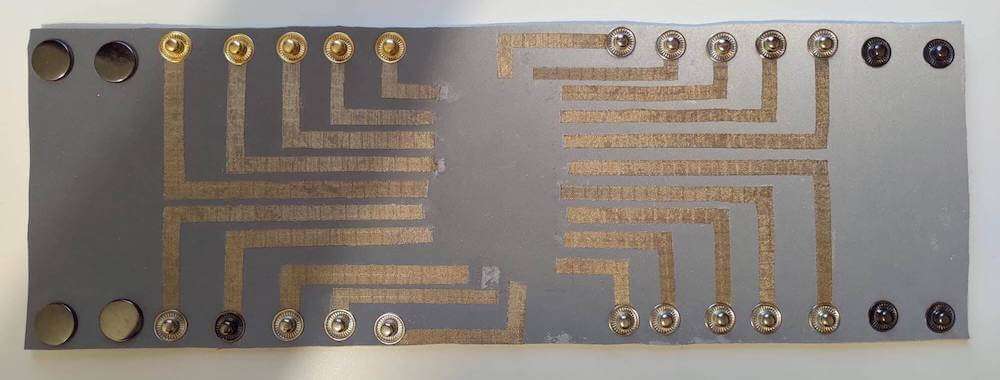
I made the yellow holes big enough for hand sewing during the post-processing.
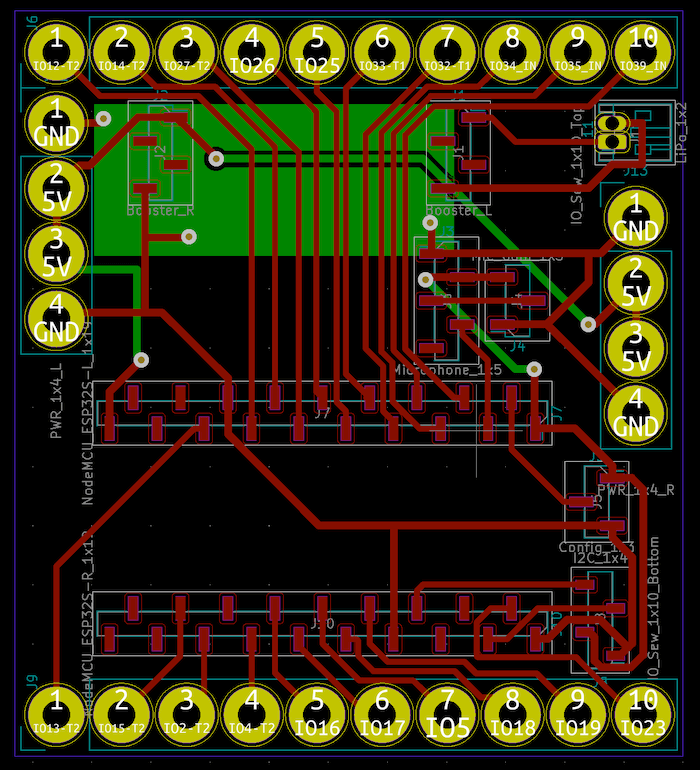
The main ESP32 shield for the belt controller (receiver) in the PCB view:
Tuesday 29.9.2020
- At 9.15-12 basic pattern making, at campus, Jane Palmu, room • At 13.15-17 Clo3D program presentation by Jane Palmu, room
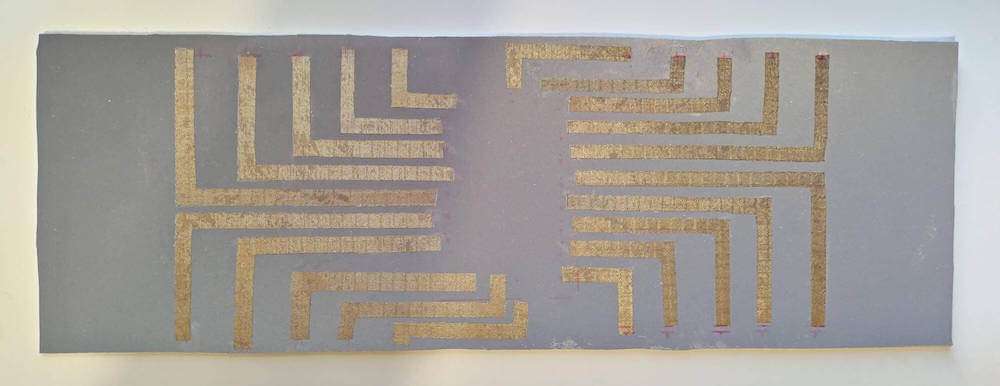
After finishing designing my shields in KiCad software, the fabrication steps of my PCB shields were that first I milled the boards with a CNC machine, debugged the milled traces with a multimeter and then soldered certain headers on them. I fabricated 3 different shields which took me 12 hours in total to wait and do the post-processing.
How did I mill the shields with a CNC machine can be found here: https://fabacademy.wantinghsieh.com/assignment/06-electronics-design
The main ESP32 shield for the bracelet controller (sender):
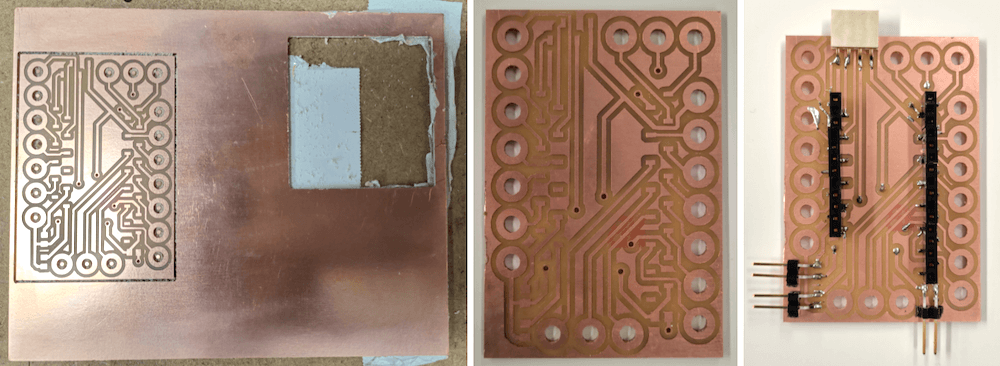
The main ESP32 shield for the belt controller (receiver) :
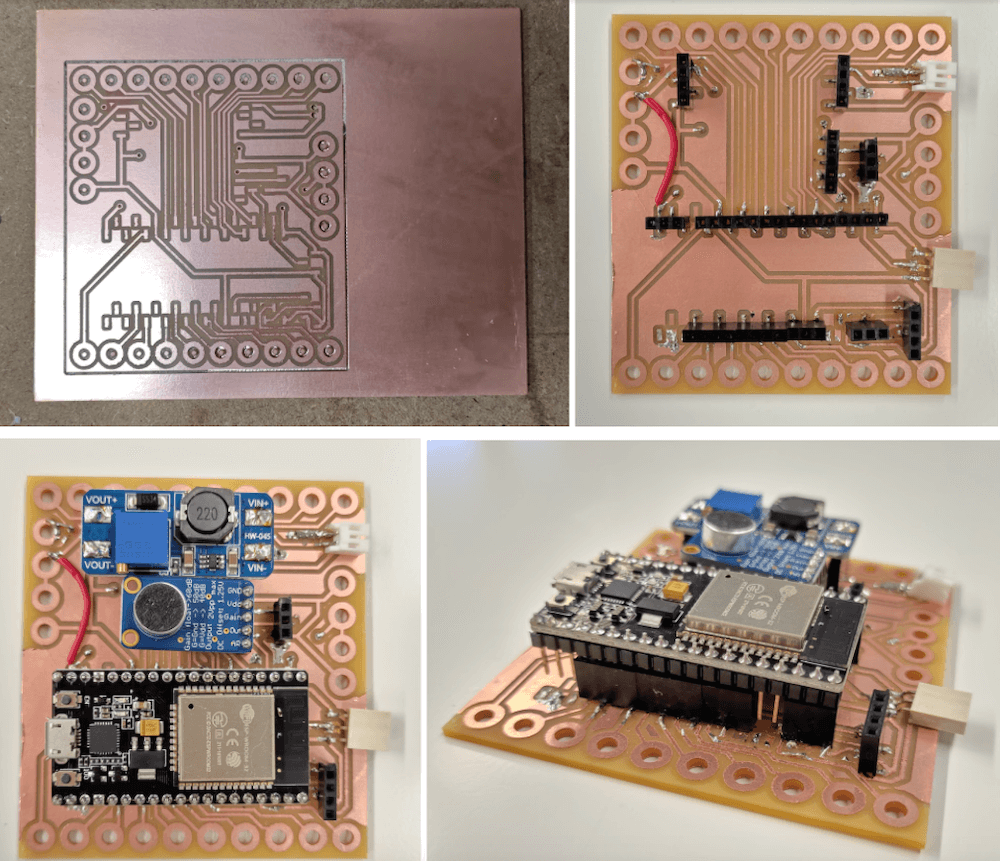
The mp3 shield (not used) for the belt controller:

Thursday 1.10.2020
- Prototyping begins at studios, tutors available: Emmi at 9.15-12, Valtteri at 13.15-16, Ilona at 9.15-12
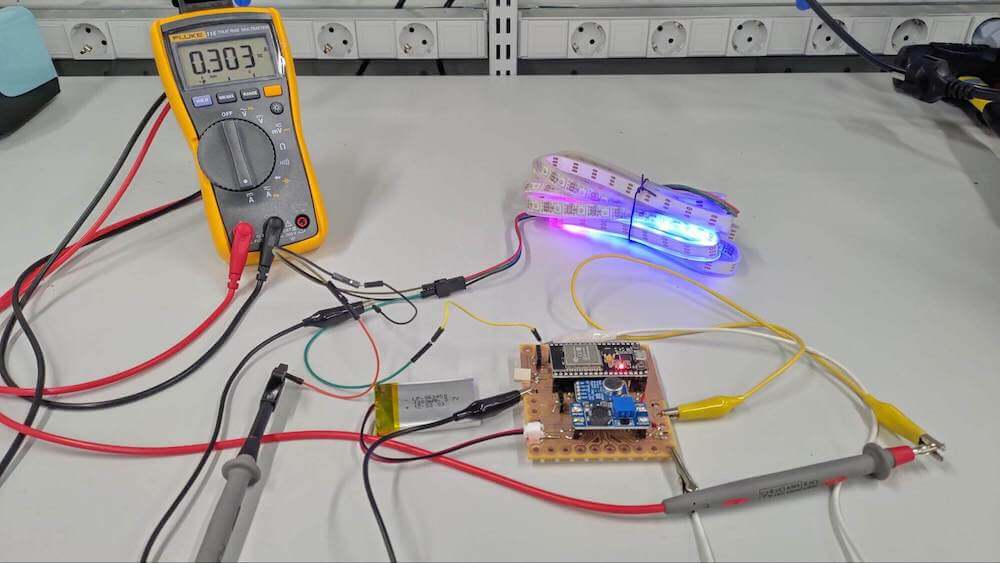
After finishing the fabrication, I connected the ESP32 microcontrollers to my customized shields and uploaded the code to the boards to test if the light patterns I defined work correctly with a standard neopixel strip connected by alligator clips.
Tuesday 6.10.2020
- Prototyping at studios, tutors available: Emmi at 9.15-12, Antti at 14- 17, Valtteri at 13.15-16, Ilona at 9.15-12
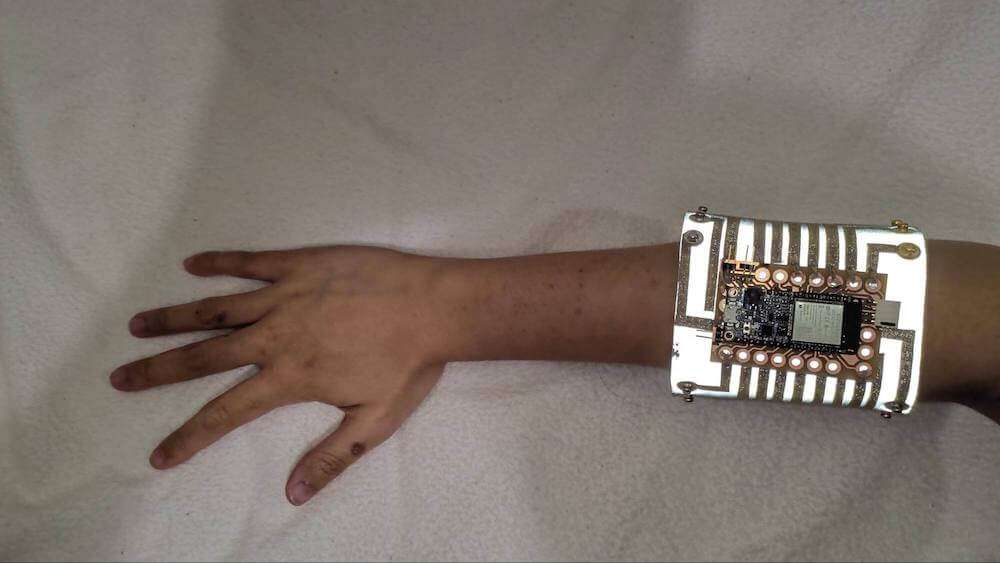
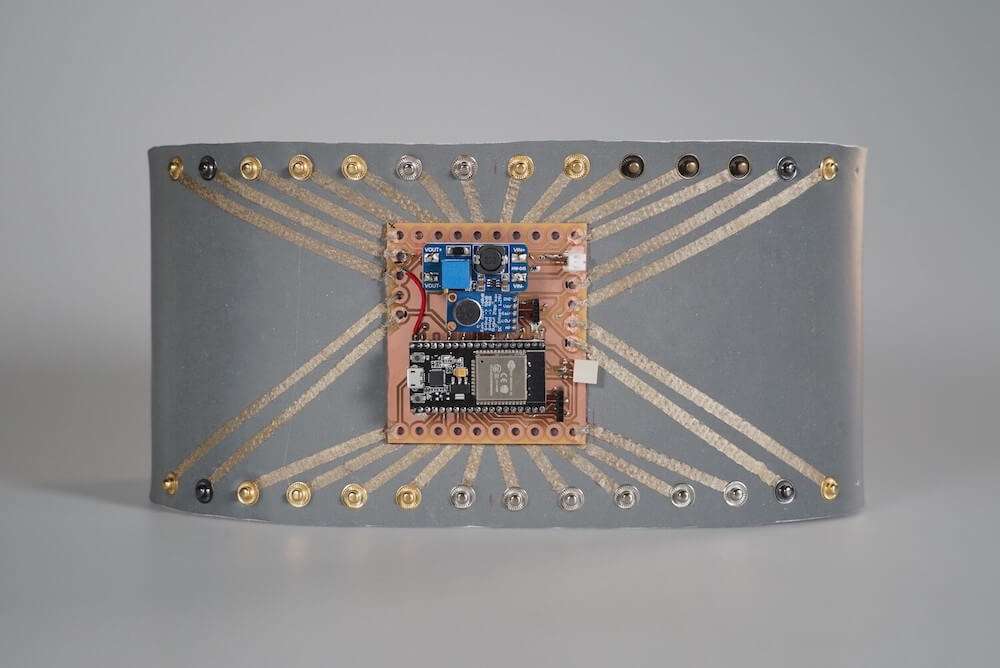
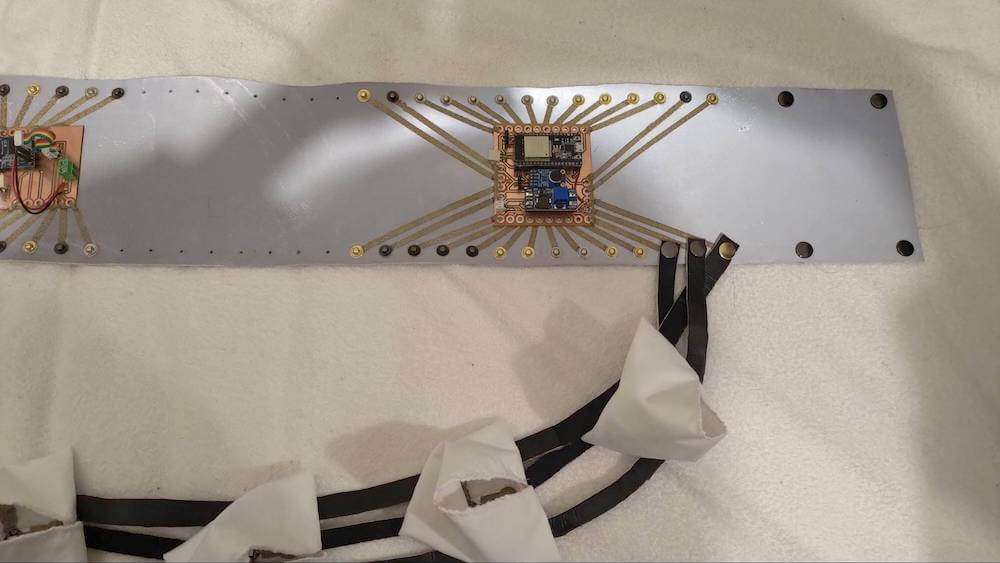
After that, I ironed some conductive fabrics in linear shape on the surface of the bracelet and belt controllers, handsewed the shields with conductive yarns and installed snap buttons for removability. For this project, I prefer to make every element removable so that I can flexibly replace or add new components without tearing down the existing ones.
Thursday 8.10.2020
- Prototyping at studios, tutors available: Emmi at 9.15-12, Valtteri at 13.15-16, Ilona at 9.15-12
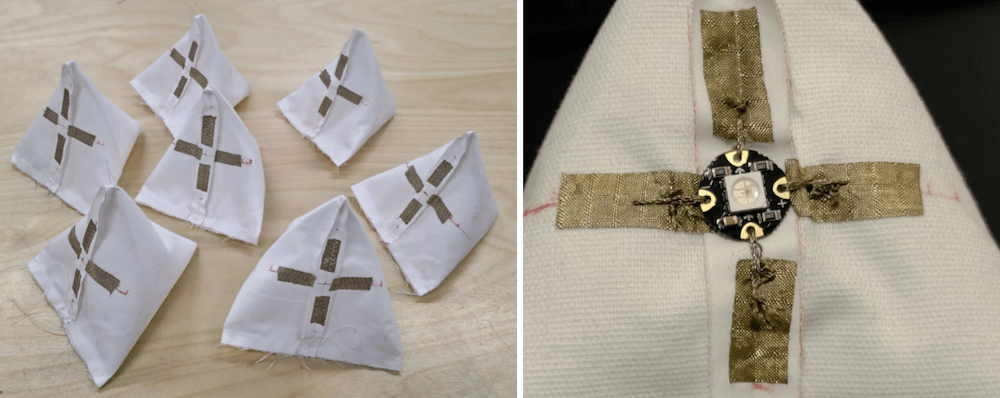
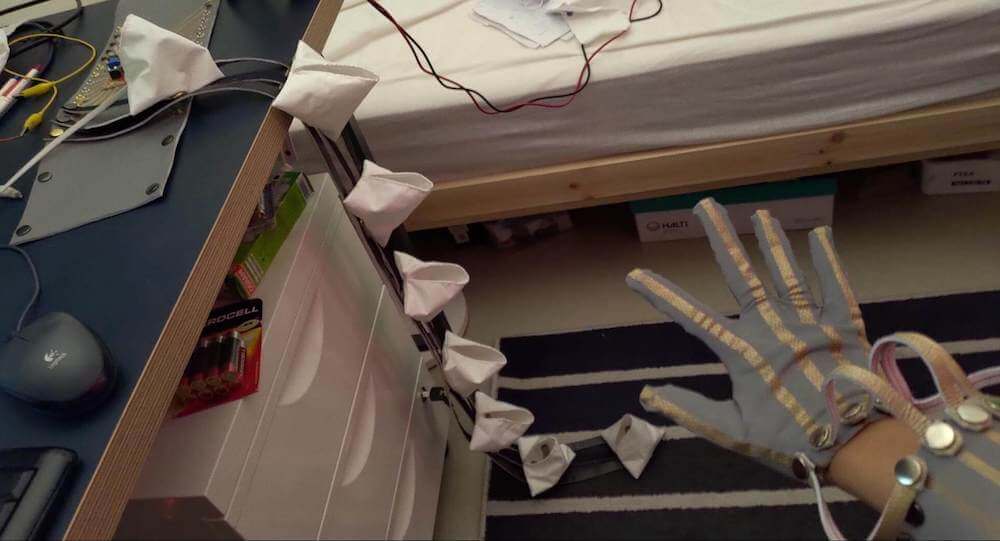
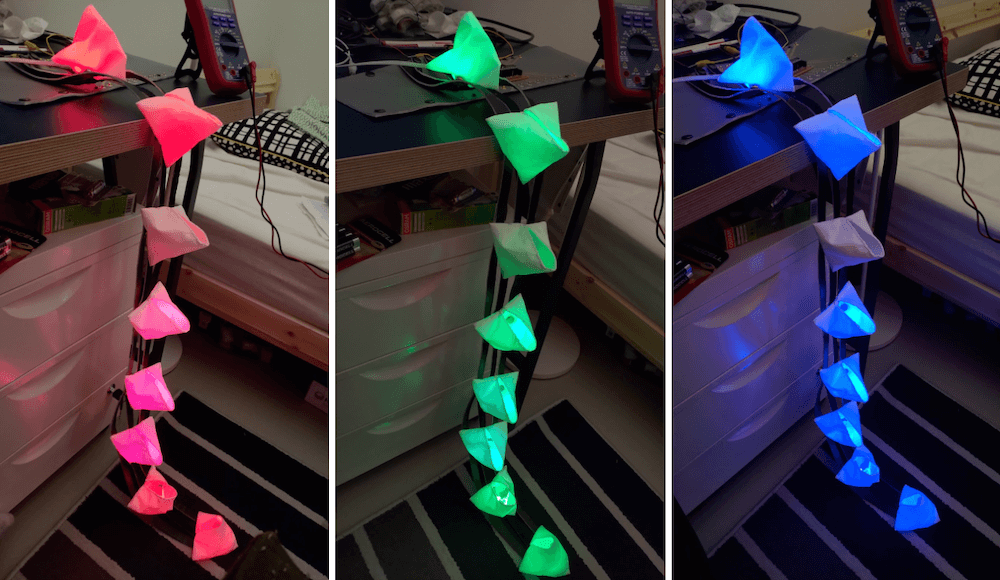
For the light modules, I applied a simple pattern which requires only one piece of fabrics to form a triangular pyramid. I first sewed the triangular structure, measured the position of the light PCB, ironed conductive fabrics, handsewed the PCB and then installed 4 snap buttons in each of the light modules.

Tuesday 13.10.2020
- Prototyping at studios, tutors available: Emmi at 9.15-12, Antti at 14- 17, Valtteri at 13.15-16, Ilona at 9.15-12
After finishing all of the elements, I connected the glove to the bracelet controller, integrated the light module strip with the belt controller and then started to debug if there is any problem with the software or hardware part.
Thursday 15.10.2020
- Prototyping at studios, tutors available: Emmi at 9.15-12, Valtteri at 13.15-16, Ilona at 9.15-12
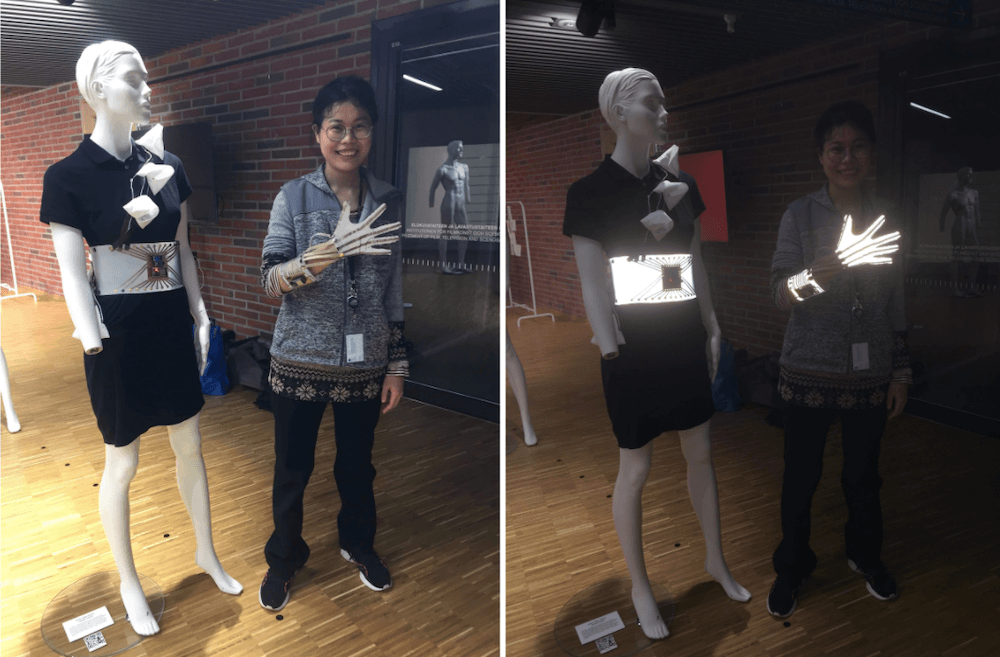
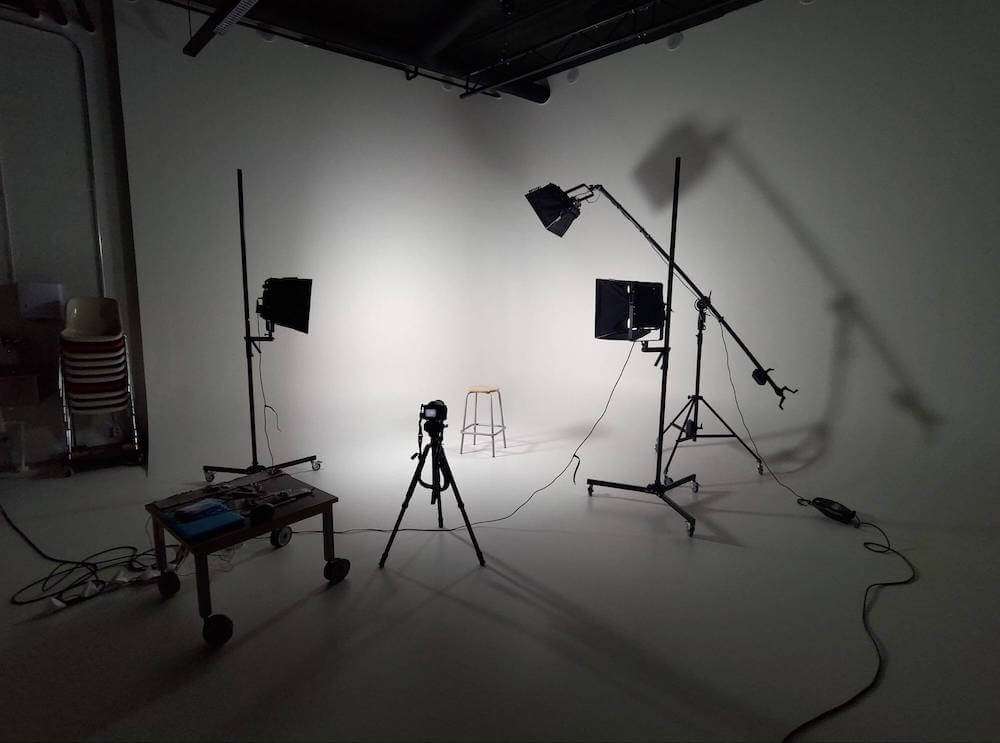
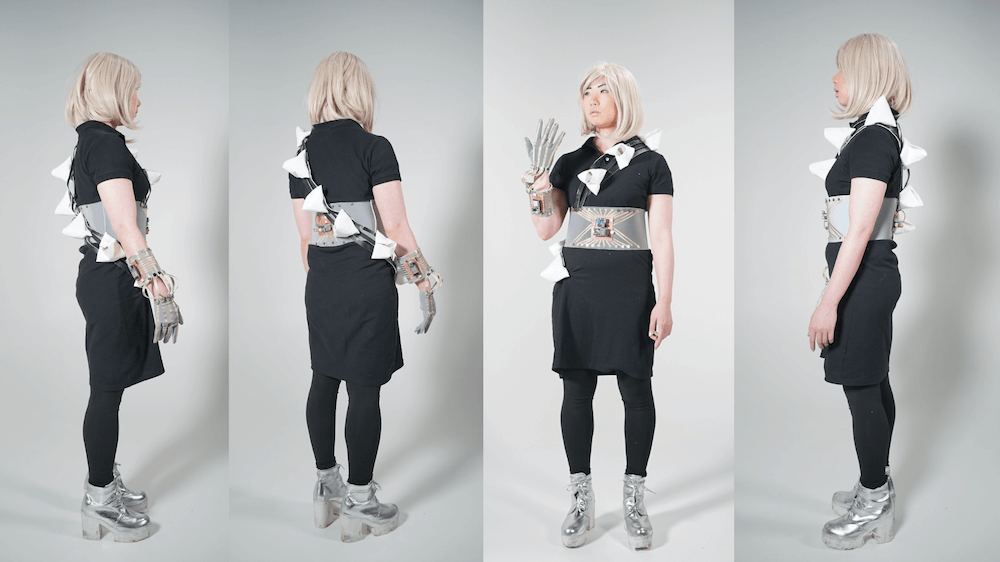
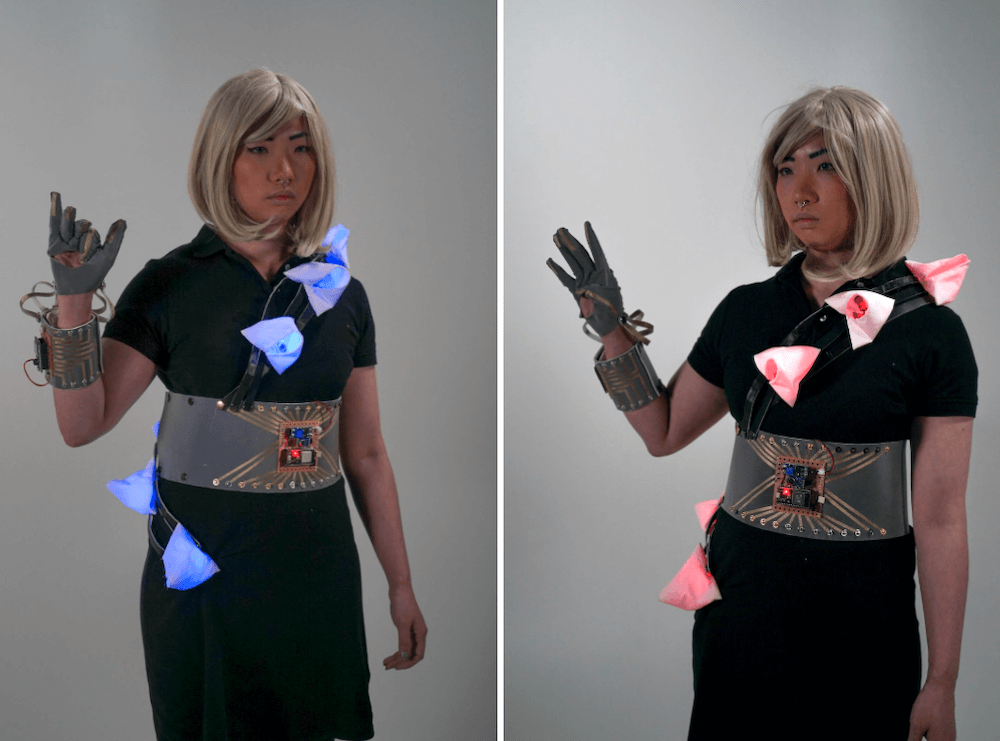
Today I booked Open Photostudio for documenting/photographing my wearable technology project (including a glove, a bracelet, a belt and 8 pieces of light modules installed on a dress) which I needed to finish within 3 weeks. Applying three-point lighting techniques learnt from videos on YouTube in real world situations are interesting and different from reproducing them in an animation. However, it is a bit difficult to photograph the color of the lighting modules and focus on the model’s details at the same time with some dim light on.
Thursday 22.10.2020
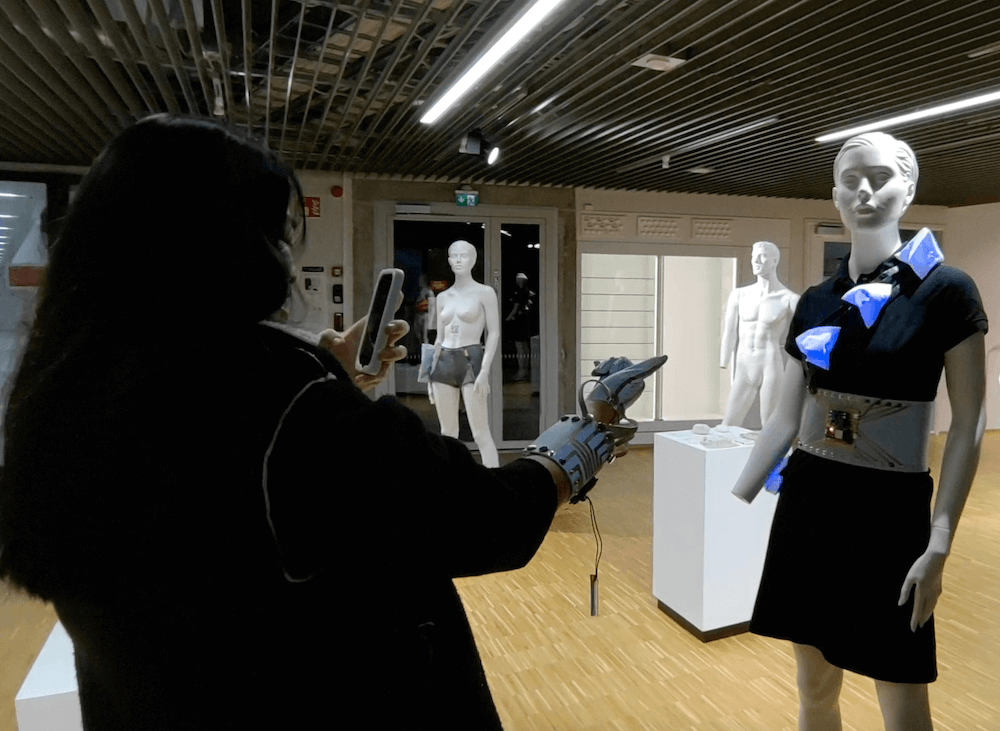
- At 9.15 final presentations at campus, room • At 13.15-17 building exhibitions
Today I learnt that my final project is more drama-oriented/better for art performance than the design for daily usage from Emmi’s suggestion during my presentation. For the interaction, Sofia suggested that I can come up with some other body movements such as touching legs or arms with my glove controller.